We allow customers to connect to their hosting via SSH so that they may run commands on the command line should they wish too, this can sometimes be useful for things like Git, making mass file systems edits, searching the files with grep commands etc. To connect you will require an SSH key, we do not allow password authentication for security reasons.
How to generate an SSH key
OpenSSH (Linux, macOS)
- First, you will need to open a terminal and run the "ssh-keygen" command.
- You will be asked where you want to store your key pair, by default, this is "~/.ssh" which is the best location so press Enter.
- Next, you will be asked to enter a passphrase, you may leave this blank to be able to establish SSH connections without entering a password but it is recommended to add a passphrase to encrypt the private key in case someone gets hold of it.
- Your SSH key pairs have now been created, you can find them in "~/.ssh" by default. The SSH client will automatically use these keys.
- The public key is in the .ssh directory and has .pub in the file name, this is your public key which you can share with anyone. Never share the private non-public key.
PuTTY (Windows)
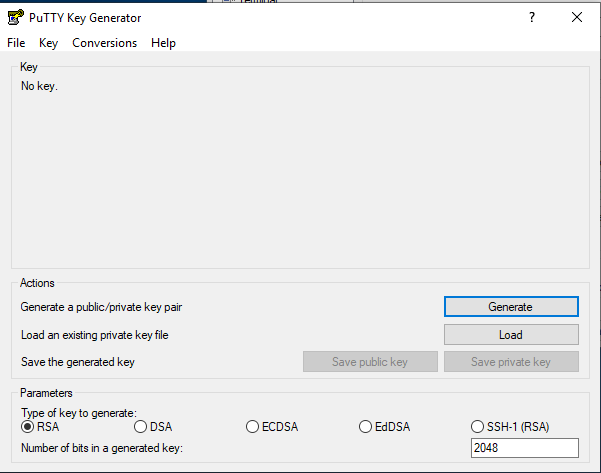
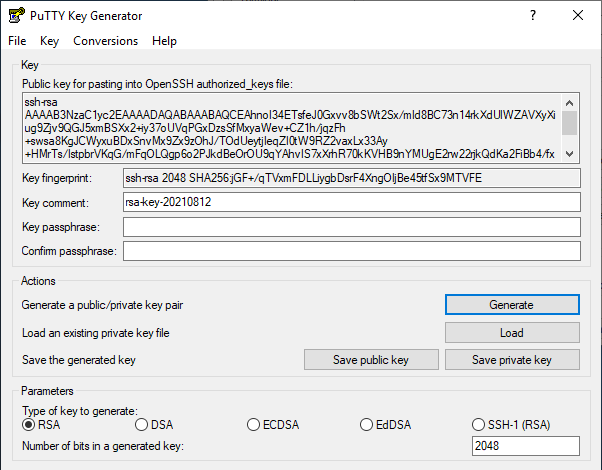
First, open PuTTYgen and click generate. Once you click generate you will need to move your mouse around in the program to create random data for the key generation.
Once the key has been generated you may enter a passphrase for added security.
Save your public and private keys somewhere where they won't get lost or be moved.
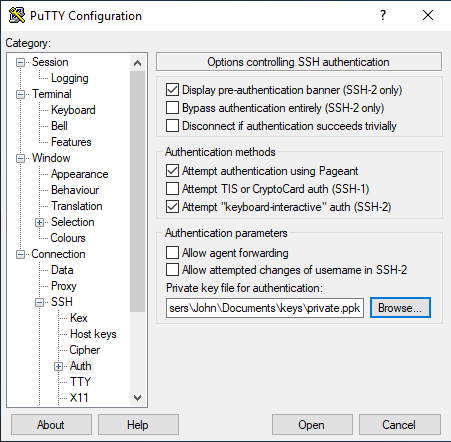
Once your public and private keys are saved you will need to open PuTTY and go to the Auth section under Connection and then SSH.
In the "Auth" section set the private key file for authentication.
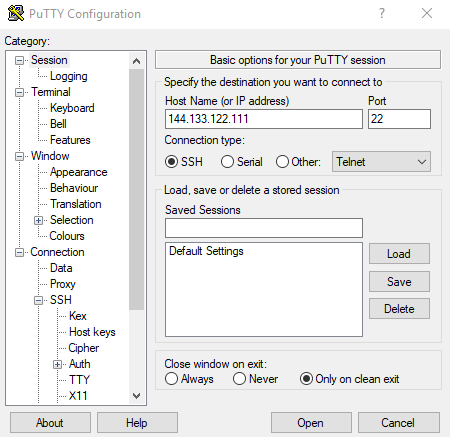
Once your public key is on your server you can go to Session, enter the IP address, make sure the connection type is SSH and click "Open"
How to upload your public key for SSH authentication
cPanel
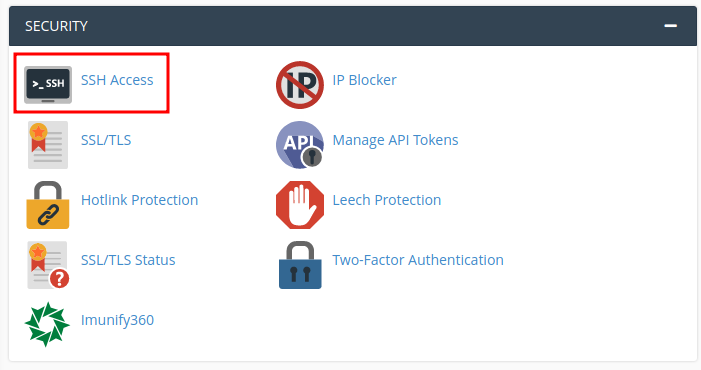
Once logged into cPanel scroll down to the security section and click on SSH Acess.
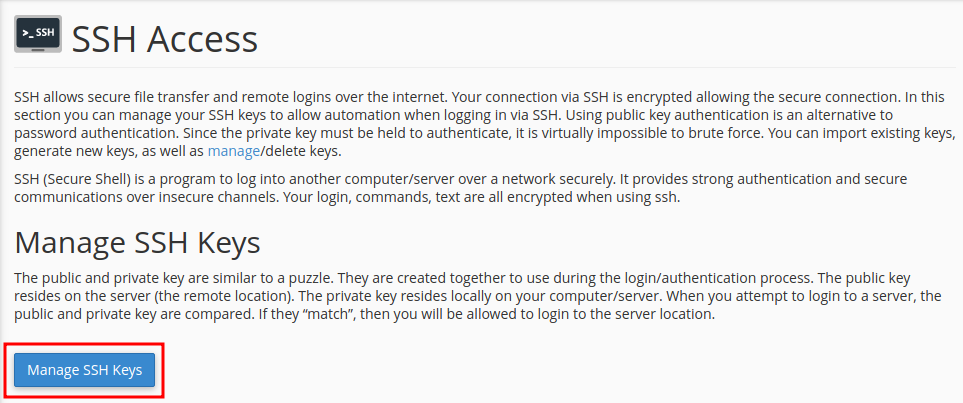
Click "Manage SSH Keys"
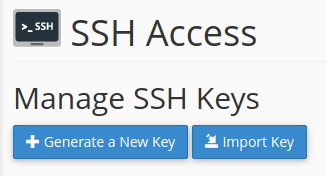
Click "Import Key".
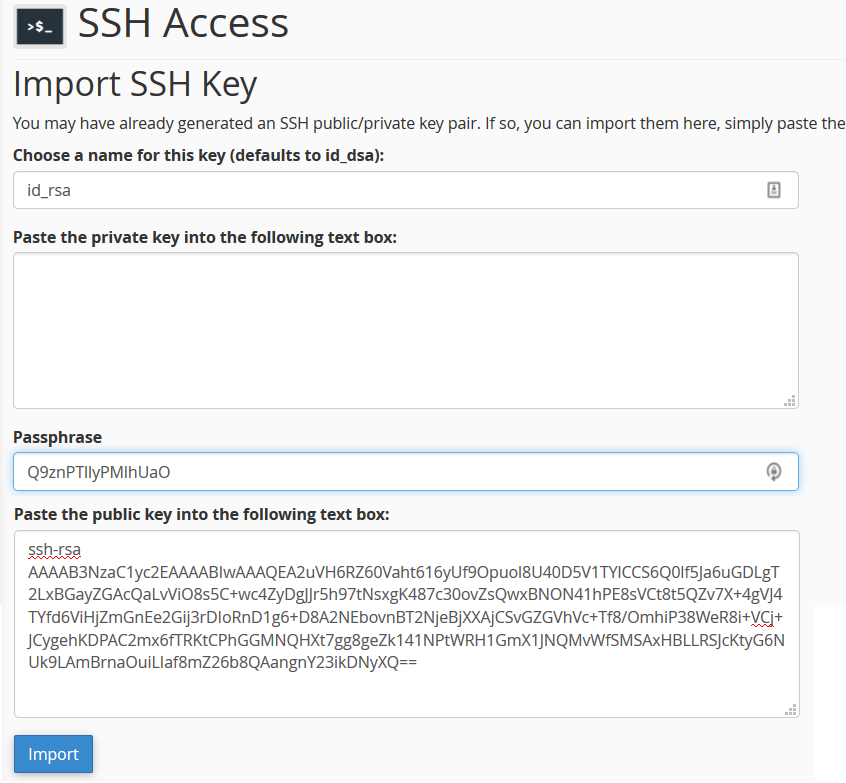
Set the name of your key. Copy and paste your "id_rsa.pub" public key, you can usually find this in your ".ssh" folder and enter the passphrase if you have set one. You can leave the private key area blank.
Click Import and go back to the Manage SSH Keys section.
Under the public keys find your key and click Manage.
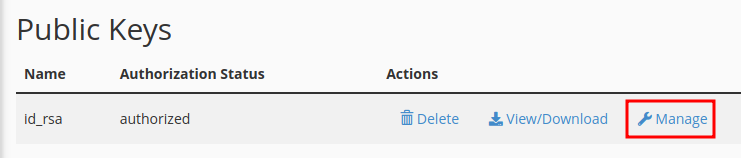
Authorize the SSH key and you should now be able to establish an SSH connection with the server.

Plesk
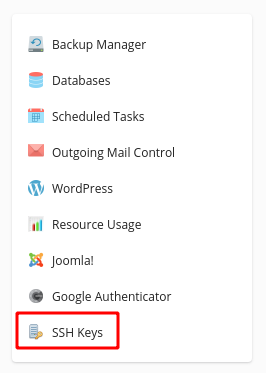
Once logged into your Plesk control panel you will need to look at the right-hand side for the SSH Keys option.
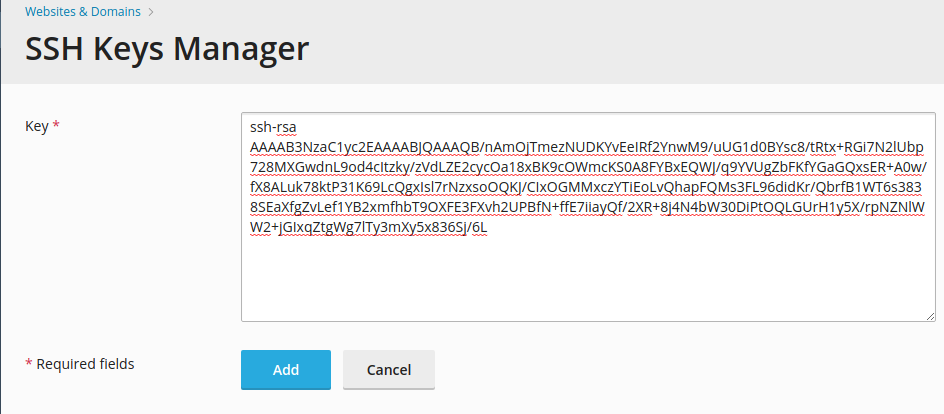
Once at the SSH Keys Manager click "Add Key"

Copy and paste your "id_rsa.pub" public key, you can usually find this in your .ssh folder and click Add.
Once your key has been added go back to "Websites & Domains" and copy the IP Address in your domains subscription and make a note of the system user, open a terminal or puTTY and SSH onto the system using the system user as the username.
Got stuck?
Open a ticket in the customer portal, call 03300 882130, or email support@freethought.uk for further help.